chtmsthd.gif

kit1.jpg 

1) The self-contained unit comes complete with mounting bracket and combination valve with lines plumbed. Master cylinder bores and booster diameters can be changed to fit your rod's particular problems. Your existing brake system is plumbed to operate the two slave cylinders behind the booster.

ex3.jpg 

3) This drawing shows the path of the old lines (green) and the path of the new lines (red) going from the old master cylinder to the slave cylinders on the new booster end. The new lines to each wheel come out of the combination valve (under the master cylinder). Use only vacuum-rated hose to the booster.

ex5.jpg 

5) Since the installation of this new system is basically a plumbing exercise, you'll need a good tubing cutter, double flaring tool and a tubing bender. An Eastman double-flaring tool is being used to re-flare the old lines.


C.H. Topping & Company
520 W. Esther St., Long Beach, CA 90813
(562) 432-0901
email: chtop@earthlink.net

ex2.jpg 

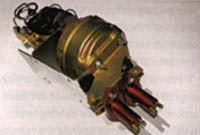
2) A 1-inch-thick piece of exterior plywood elevates and acts as a double plate to strengthen the floor mount. With a double-diaphragm, 7-inch-diameter booster, the entire unit measures just under 23 inches long and 10 inches high.


ex4.jpg 

4) Since Bunting has done so many
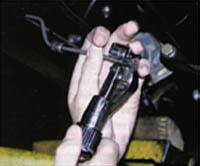
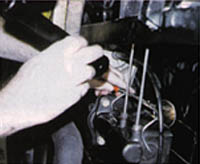
hot rods, he doesn't bother removing the carpet with dirty hands. The original non-boosted master cylinder, under the floor, can easily be inspected with a flashlight and a flexible mirror head.


ex6.jpg 

6) Replumbing can be done a million ways, depending on how much time and money you want to spend. Cutting into the old plumbing and adding unions to connect the new lines to the remote unit is the simplest way. It took about 8 hours of plumbing to complete this job.